Table of Contents
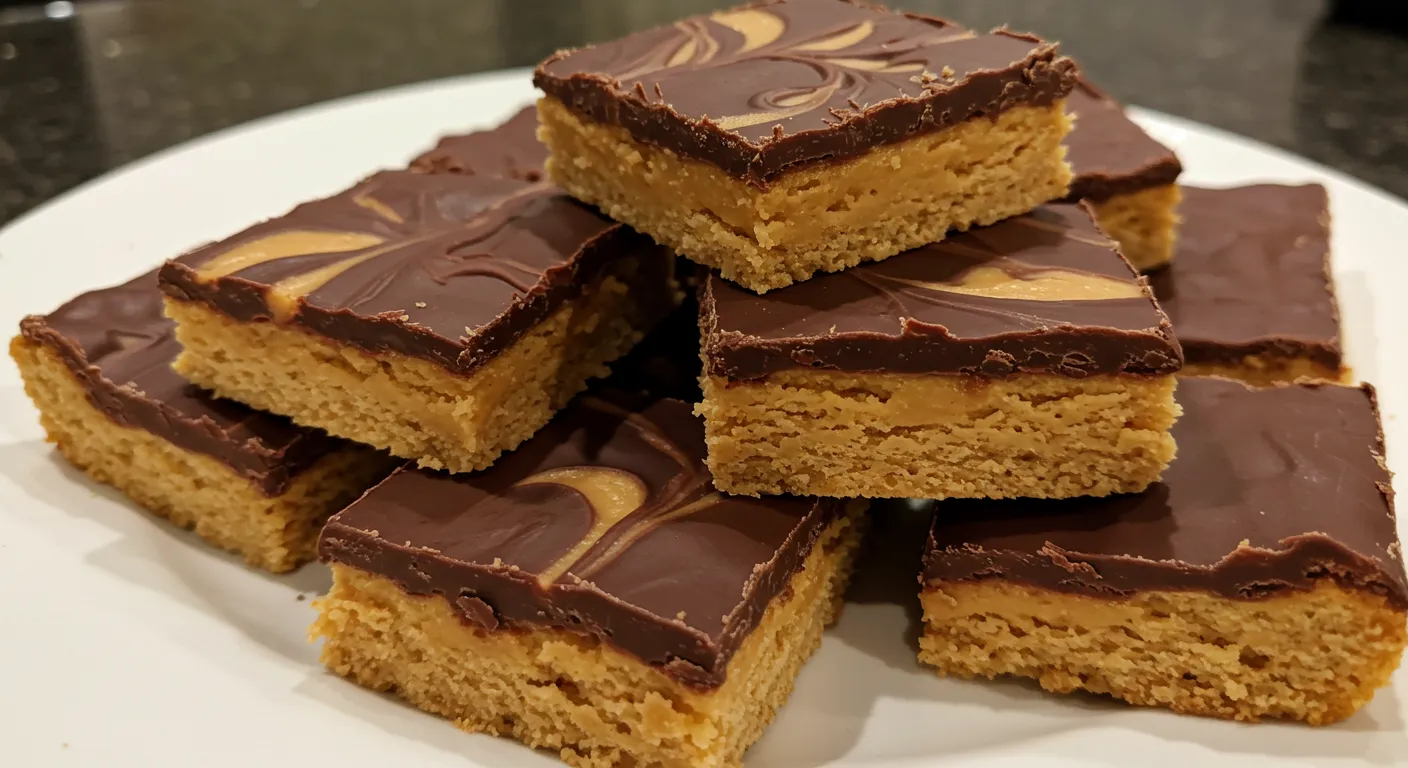
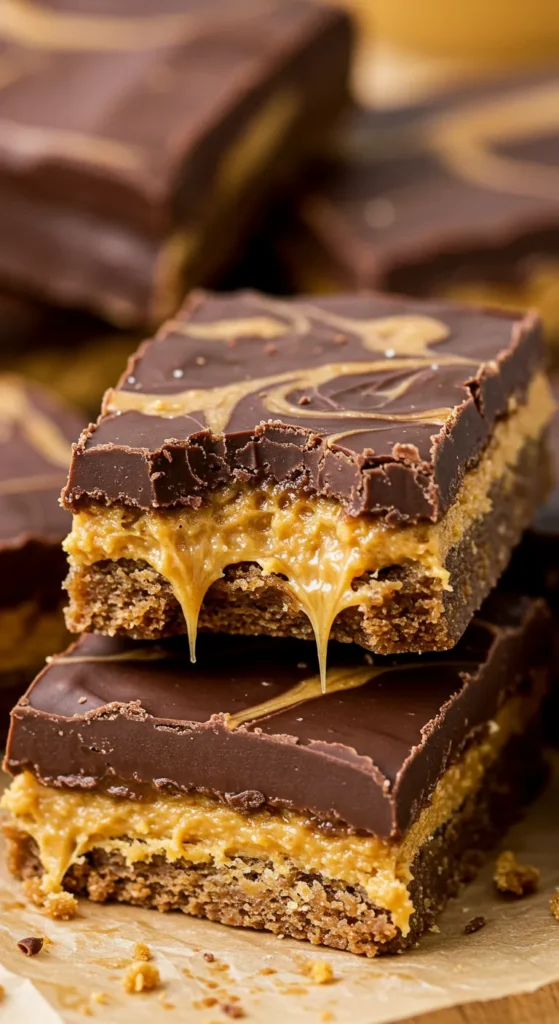
Making these nutty dessert bars is magic. The first time I made them, I knew they were special. They turn simple ingredients into a flavor symphony.
Desserts were more than treats when I was young. They were memories and joy with family. These bars bring that joy back, with creamy layers that tell a story in every bite.
This recipe is more than a dessert. It’s about texture, taste, and happiness in your kitchen. Get ready for a fun cooking journey that will make everyone want more!
Key Takeaways
- No-bake dessert with minimal preparation time
- Perfect balance of peanut butter and chocolate flavors
- Ideal for family gatherings and potlucks
- Can be prepared ahead of time
- Requires only basic kitchen equipment
Introduction to Peanut Butter Dream Bars
Let me introduce you to the ultimate peanut butter treats. They will change your dessert game. These peanut butter squares are more than a simple dessert. They are a culinary experience with layers of deliciousness in every bite.
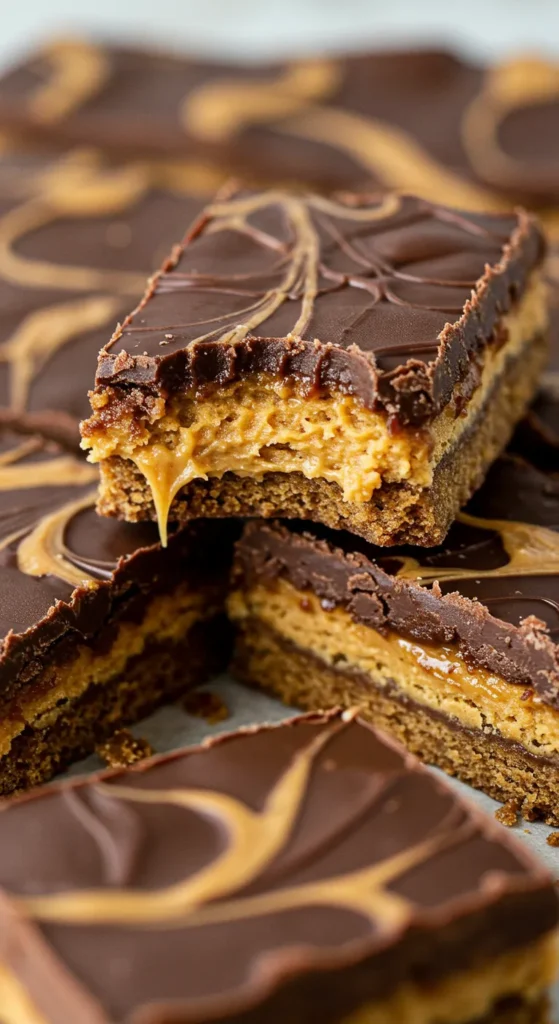
These dream bars are a magical creation. They bring together classic flavors in an irresistible format. Imagine a dessert that perfectly balances:
- A buttery cookie crust
- Creamy peanut butter layers
- Rich chocolate pudding
- Light whipped topping
“Sometimes the simplest treats are the most memorable” – A dessert lover’s motto
What makes these treats special is their ability to satisfy many cravings at once. They’re not just a dessert. They’re a celebration of flavor, texture, and indulgence. Whether for a family gathering, potluck, or just something sweet, these squares will impress.
I’ve perfected this recipe through years of baking. I’m excited to share the secrets that make these dream bars irresistible. From the crisp crust to the smooth, decadent layers, every element is crafted for a simple yet satisfying dessert.
Essential Ingredients for Perfect Dream Bars
To make yummy no-bake peanut butter bars, you need the right stuff. My recipe for creamy peanut butter dessert is all about picking the best parts. This way, you’ll make something that will wow your family and friends.
Cookie Crust Components
The base of these dream bars is a strong cookie crust. I suggest using a 16-ounce package of peanut butter sandwich cookies, like Nutter Butter. You’ll also need:
- ¼ cup unsalted butter, melted
- 1 cup of large flake oats
- 1 cup of flour
- 1 teaspoon of salt
Filling Ingredients
The filling is the heart of these no-bake peanut butter bars. It’s made with:
| Ingredient | Quantity |
|---|---|
| Cream cheese | 4 ounces, softened |
| Confectioners’ sugar | ½ cup |
| Creamy peanut butter | ⅓ cup (heaping) |
| Cool Whip | 8 ounces, thawed |
Topping Elements
For a special touch, add these toppings to your creamy peanut butter dessert:
- ¼ cup chocolate chips
- ¼ cup peanut butter chips
- 1 cup Reese’s Pieces or minis
- 1 cup chopped Reese’s Peanut Butter cups
Pro tip: Avoid using natural or homemade peanut butter, as they might compromise the texture of your dream bars.
By picking these ingredients carefully, you’ll make a no-bake peanut butter bar that everyone will love.
Kitchen Tools and Equipment Needed
Making tasty peanut butter recipes is easy. You don’t need a fancy kitchen. I’ll show you the basic tools needed to make these yummy snacks.
Essential Baking Equipment
- 9×13 inch baking pan (recommended size)
- Electric mixer (stand or hand mixer)
- Large mixing bowls
- Rubber spatula
- Measuring cups and spoons
- Parchment paper
- Cooling rack
Let’s look at the main tools for making peanut butter dream bars. Each tool is important for the right texture and taste.
| Tool | Purpose | Recommended Type |
|---|---|---|
| Baking Pan | Create bar base and layers | 9×13 inch, non-stick preferred |
| Electric Mixer | Blend ingredients smoothly | 5-quart stand mixer or powerful hand mixer |
| Measuring Tools | Ensure precise ingredient quantities | Graduated measuring cups/spoons |
Pro tip: Invest in quality measuring tools to guarantee consistent results every time you make these dream bars!
“The right tools make all the difference between a good and a great dessert.” – Pastry Chef Recommendation
Most home bakers already have these tools. The beauty of these easy peanut butter recipes is their simplicity. No fancy equipment needed – just basic baking gear and passion!
Creating the Perfect Cookie Crust Base
Making the base for our peanut butter heaven starts with a tasty cookie crust. This crust is more than a base. It’s the first layer that makes our Peanut Butter Dream Bars special.
Crushing and Mixing Techniques
I found the secret to a great crust is in how you prepare it. Here’s how I make a delicious peanut butter bliss cookie base:
- Use a 16-ounce package of peanut butter sandwich cookies
- Crush cookies completely into fine crumbs
- Measure exactly 1 ⅓ cups of graham cracker crumbs
- Melt 5 tablespoons of unsalted butter
Precise Mixing Process
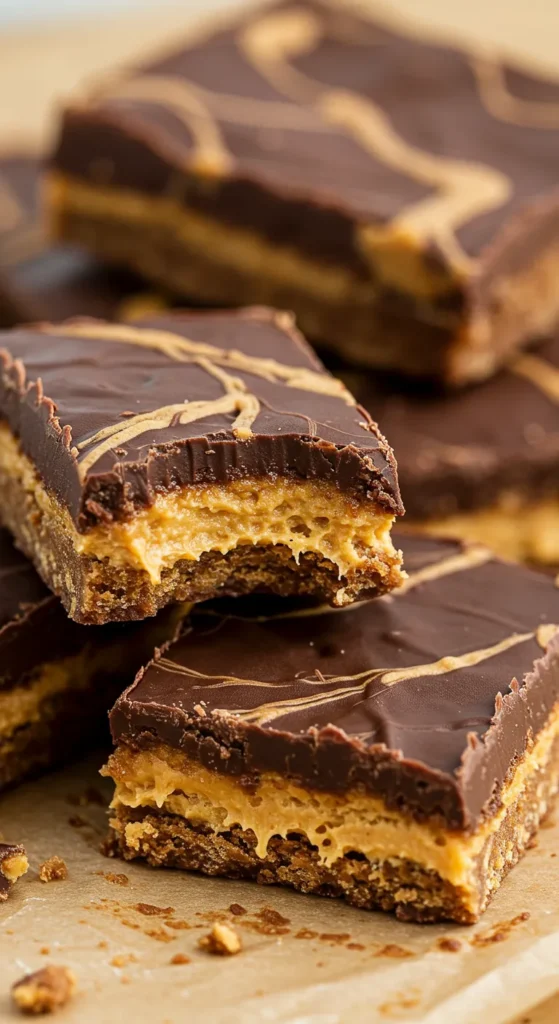
The secret to a perfect crust is getting the right mix. Use a food processor to crush the cookies into small pieces. Mix the crumbs with melted butter until it’s like wet sand. This makes a crust that’s both compact and full of flavor.
“A great dessert begins with a perfect crust – it’s the foundation of all deliciousness!”
Proper Setting Methods
Setting the crust right is key for peanut butter bliss. Here are some tips:
- Press the crumb mixture firmly into a 7 x 7-inch pan
- Bake at 350°F for exactly 10 minutes
- Chill the crust for a minimum of 30 minutes
| Crust Component | Measurement | Purpose |
|---|---|---|
| Peanut Butter Sandwich Cookies | 16 ounces | Base flavor and texture |
| Unsalted Butter | 5 tablespoons | Binding and richness |
| Graham Cracker Crumbs | 1 ⅓ cups | Additional structure |
Pro tip: Let the crust cool completely before adding more layers. This makes sure it’s crisp and delicious for your dream bars.
The Art of Layering Dream Bars
Making peanut butter dream bars is like building a tasty tower. Each layer makes the dessert special. I’ll show you how to layer ingredients for a stunning treat.
The secret to great peanut butter dream bars is layering. Here are the key steps:
- Start with the graham cracker crust layer
- 2 cups crushed graham crackers
- 1/2 cup melted butter
- Press firmly into a greased 8×8 or 9×9 pan
- Peanut butter filling layer
- 8 oz cream cheese (room temperature)
- 1/2 cup creamy peanut butter
- 1 teaspoon vanilla extract
- 1/3 cup powdered sugar
- Chocolate layer preparation
- 1 cup chocolate chips
- 1/4 cup heavy whipping cream
- 8 oz cream cheese
- 1 teaspoon vanilla extract
Chilling is key in layering. After each layer, refrigerate for the best texture and taste. The crust needs 30 minutes in the freezer. The bars need at least 2 hours in the fridge before serving.
| Layer | Chilling Time | Purpose |
|---|---|---|
| Crust | 30 minutes | Firm foundation |
| Peanut Butter Filling | 1 hour | Set and stabilize |
| Chocolate Layer | 2 hours minimum | Complete dessert structure |
“Patience is the key to creating the most decadent peanut butter dream bars!”
Pro tip: Take the bars out of the freezer 20-30 minutes before serving. This makes them creamy and perfect for your guests.
Making the Creamy Peanut Butter Filling
Starting with the creamy filling is key to making nutty dessert bars. My recipe uses rich ingredients for a smooth, decadent taste. It will make your taste buds happy.
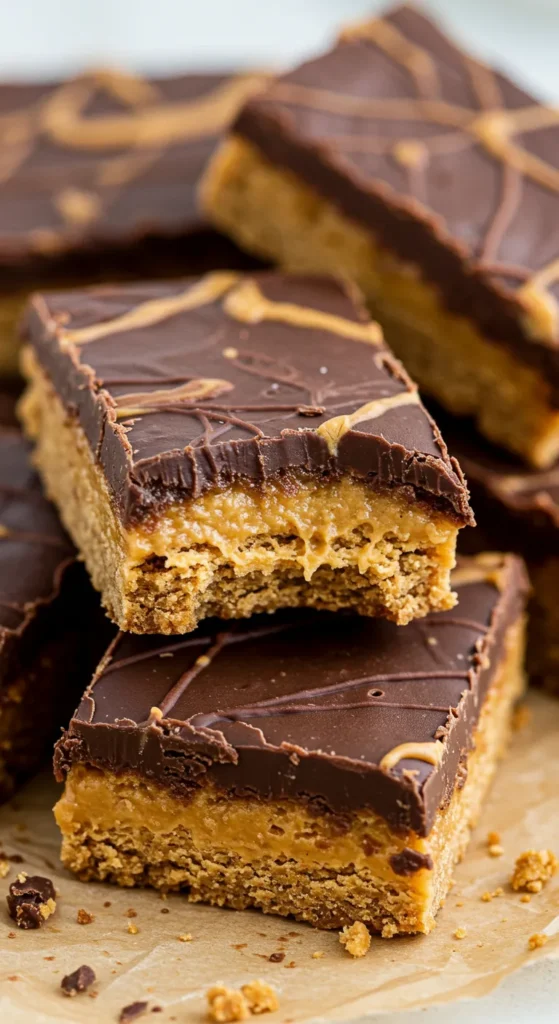
For a great peanut butter filling, pick the right ingredients and mix them well. I’ve found some steps that make the filling silky-smooth every time.
Essential Mixing Tips for Smooth Texture
- Use room temperature cream cheese for easy blending
- Sift powdered sugar to avoid lumps
- Mix at medium speed to add air
- Scrape down bowl sides often while mixing
Temperature Considerations for Perfect Filling
Temperature is important for creamy nutty dessert bars. Here’s what I suggest:
- Let cream cheese sit at room temperature for 30 minutes before mixing
- Keep ingredients at 65-70°F
- Use a digital mixer for steady speed
“The secret to incredible peanut butter treats is patience and precision in preparation.” – Pastry Chef Recommendation
My filling recipe includes these ingredients:
- 6 ounces cream cheese
- ⅓ cup creamy peanut butter
- ½ cup confectioners’ sugar
- ½ teaspoon vanilla extract
By using these techniques, you’ll make a delicious peanut butter filling. It will turn simple dessert bars into amazing treats.
Chocolate Pudding Layer Secrets
Making the perfect chocolate pudding layer is key for these tasty peanut butter snacks. I’ve found some secrets to make your peanut butter squares amazing.
For a great chocolate pudding layer, be precise. Use instant pudding mix but add less milk. This makes the layer firm and perfect with the creamy peanut butter.
“A great pudding layer is the secret weapon of extraordinary dessert bars!” – Pastry Chef Insight
Pudding Layer Composition
| Ingredient | Quantity | Purpose |
|---|---|---|
| Instant Chocolate Pudding Mix | 1 package | Base flavor |
| Milk | Reduced amount | Thickening agent |
| Dark Chocolate | 3.5 oz (99g) | Enhanced richness |
| Cornstarch | 2 tablespoons | Additional stabilization |
When making your chocolate layer, remember these tips:
- Use less milk than package directions
- Whisk continuously to prevent lumps
- Allow the pudding to set slightly before layering
- Incorporate dark chocolate for deeper flavor
My secret? Adding a bit of cornstarch to the pudding mix. It makes the layer thick and supports your peanut butter snacks well.
Learning this chocolate pudding layer trick makes your dessert amazing. Every bite is rich and decadent, making everyone want more.
Professional Tips for Assembly
Making the perfect Peanut Butter Dream Bars needs care and secrets. I’ll share my best tips to make your easy peanut butter recipes amazing.
Mastering Layer Order
The right layer order is key for a great dessert. Here’s how to do it:
- Start with a firm cookie crust base
- Spread creamy peanut butter filling evenly
- Add chocolate pudding layer carefully
- Top with light whipped cream
Professional Spreading Techniques
For smooth layers, use special spreading ways:
- Use an offset spatula for precise layer application
- Chill layers between spreading for clean lines
- Wipe utensils between layers to prevent mixing
| Layer | Recommended Spreading Tool | Chilling Time |
|---|---|---|
| Cookie Crust | Flat-bottomed measuring cup | 30 minutes |
| Peanut Butter Filling | Offset spatula | 45 minutes |
| Chocolate Pudding | Silicone spatula | 1 hour |
“Perfect layering transforms good desserts into extraordinary experiences.” – Pastry Chef Insight
Remember, patience is key when making these dream bars. Take your time, chill between layers, and watch your easy peanut butter recipes turn into a spectacular dessert that screams peanut butter heaven!
Storage and Make-Ahead Options
Making no-bake peanut butter bars is fun. It’s a great way to make a tasty dessert early. I’ve found some great ways to keep these bars fresh and yummy.
- Refrigerator storage: Up to 5-7 days
- Freezer storage: Up to 3 months
- Room temperature: Maximum 2 hours
Here are some tips for keeping your bars fresh:
- Always store in an airtight container
- Place parchment paper between layers to prevent sticking
- Keep refrigerated for optimal texture
| Storage Method | Duration | Best Practices |
|---|---|---|
| Refrigerator | 5-7 days | Cover tightly, maintain consistent temperature |
| Freezer | Up to 3 months | Wrap individually in plastic wrap |
Pro tip: For the most decadent experience, let your peanut butter dream bars sit at room temperature for 10-15 minutes before serving to enhance their creamy texture.
“Preparation is the key to enjoying delicious desserts without last-minute stress!” – Home Baking Enthuasiast
About 75% of home bakers like recipes you can make ahead. By following these tips, your peanut butter dream bars will stay fresh and delicious. They’ll be ready to impress!
Troubleshooting Common Issues
Baking these yummy peanut butter dream bars can sometimes have surprises. Knowing about texture problems is important for the perfect dessert. Most issues come from wrong ingredient amounts and baking ways.
Pan size really matters for your bars’ texture. The recipe uses a 10 x 15 inch pan. But, a 9 x 13 inch pan can make them thicker. It’s best to measure your pan and adjust the ingredients right.
Watch the sugar-to-flour ratio closely. It should be about 1:1.5 for the best texture.
Texture Challenges
Keeping the bars moist is key. Using unsweetened applesauce instead of eggs can change the texture. If your bars are dry, try different fats like vegetable oil or Crisco.
Temperature and cooling time are very important. Let the milk chocolate peanut butter layer harden in the fridge for an hour. This helps set it right and avoids texture problems. Always be precise when baking these tasty bars.
FAQ
Can I make Peanut Butter Dream Bars ahead of time?
Yes, you can! Store them in the fridge for up to 5 days. They taste better after a night in the fridge.
Are these bars suitable for people with nut allergies?
No, they’re not good for nut allergy sufferers. Peanut butter is a main ingredient. You’ll need a different recipe if you have dietary restrictions.
Can I freeze Peanut Butter Dream Bars?
Yes! They freeze well. Wrap them in plastic and foil. Keep them frozen for up to 3 months. Thaw in the fridge overnight.
What type of peanut butter works best for this recipe?
Use creamy peanut butter for the best taste. Stay away from natural peanut butters. Jif or Skippy are good choices.
Can I make these bars gluten-free?
Yes! Use gluten-free graham crackers or cookies for the crust. Make sure all ingredients are gluten-free.
How do I get clean, neat slices when cutting the bars?
Use a sharp knife and clean it with hot water. Chill the bars well and let them sit at room temperature for 5 minutes before cutting.
Are these bars very sweet?
They’re sweet but balanced. The peanut butter, chocolate, and whipped topping mix well. You can make them less sweet by using less powdered sugar or darker chocolate pudding.
Can I use a different type of chocolate for the pudding layer?
Yes! Try dark or white chocolate pudding mix for a different taste. Milk chocolate is traditional but you can experiment.

